Firmware in Rust

Lately I’ve been working on firmware written in Rust for the SAMD21 microcontrollers – these are the same as used in Arduino Zero for instance. The Rust ecosystem for microcontrollers is still in its early days, but is moving quickly and I think in a good direction.

One of the most exciting developments in this new Rust firmware world, is the first-class tooling, including for debugging. I gave a little “show and tell” at the November session of Code Craft, and wrote up a summary there – check it out if you’re interested!

If there is enough interest, maybe we could organise a series of evenings where we put together some little thing that involves a microcontroller and programming it with these new tools?
Adafruit Feather M0 Express

The courier showed up today, with a really neat new board from Adafruit – the Feather M0 Express. It is essentially a break out board for the Microchip (formerly Atmel) ATSAMD21G18, which is the same ARM M0+ micro used in the Arduino Zero, plus a 2MB flash memory, RGB LED, and a LiPoly charger. It’s not too expensive at $20USD, nice and tiny, and I think could be a real hit.

Using the Feather M0 Express from Arduino IDE almost couldn’t be easier – just add the Adafruit Board Manager URL to your Arduino IDE settings, then install the “Adafruit SAMD Boards” – instructions at https://learn.adafruit.com/add-boards-arduino-v164 .

However, the really exciting new option available with this new board, is CircuitPython – Adafruit’s implementation of MicroPython. Continue reading “Adafruit Feather M0 Express”

Debugging AVRs (without Atmel Studio)

This post is somewhere between a guide and a collection of notes, aimed at debugging programs for AVR microcontrollers (like the ones in most Arduinos) “on target”. We’ll be using an AVR Dragon connected to the target micro via the normal 6-pin programming header, with a Mac or Linux PC as the host.

Although this is a bit more advanced than most of our other projects, it’s really quite approachable and is a very powerful technique for fixing AVR software problems.

From a high level; we’ll use a debugging program on a Mac (or Linux, Windows, etc) “host” computer, which communicates with a Dragon “In Circuit Emulator” (ICE) via USB to debug a buggy program running on the “target” AVR, which is presumably running in some circuit we’re interested in. Small variations might apply for Windows hosts, using JTAG instead of DebugWIRE, other debugger tools (Atmel JTAGICE mkII for example), etc.

Continue reading “Debugging AVRs (without Atmel Studio)”

Arduinos and Macs

arduino

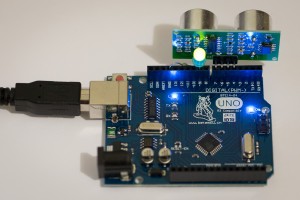
This evening, I finally got around to unwrapping the Arduino clone that came with my DSpace membership. Starting a project for the board couldn’t be easier, using the nice Arduino IDE from https://www.arduino.cc, but I ran into a little snag when it was time to upload the program onto the board. It turns out that these clone Arduinos use a newish low-cost USB to serial converter chip called a CH340G, rather than the FTDI brand chips used in the genuine Arduino boards. The CH340G that isn’t supported by MacOS by default, and I use MacOS, so the board didn’t show up in the Arduino application’s list of serial ports…

Fortunately, other folks have run into the same problem and have written up some nice blog posts on how to solve exactly this issue!

Talk: Introduction to JavaScript & Web Development

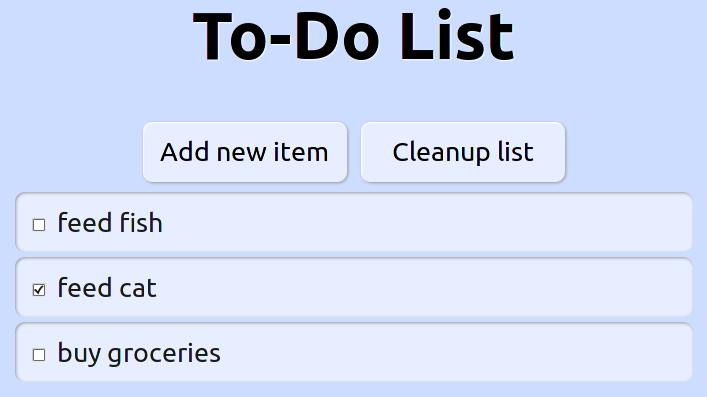
Learn the basics of JavaScript, HTML and CSS in web development to build a simple to-do list webapp.

The second Thursday night software topic I held was another introduction to JavaScript, this time focusing on the web development side. This included a crash course in HTML and CSS, with a little bit of jQuery (a popular JavaScript library).

We had a smaller turn out this time (around a dozen), thanks to school holidays and the Easter break. But everyone there got actively involved and asked a lot of great questions. Many thanks to Anne (who helped set up) and Paul (who typed for me) who helped me get through the night with a broken wrist.

The slides I started off with are available here. They act as an introduction to the talk and to basic HTML, CSS, JavaScript and programming concepts.

The rest of the talk was learn-by-example and learn-by-doing. We built a web page that provided a simple to-do list webapp.

The code is listed below in the resources. Note that to view the code in your browser for these examples (or any webpage), right click on the page and select “View Page Source”. Or you can just save the page and open it in your favourite text editor.

As usual, there was a lot covered in this talk. And some of the code in the printed handouts (the new stuff in step 4) wasn’t covered, but leads on from what I did cover.


Resources from this talk:

Additional resources:

Talk: Introduction to JavaScript & Firefox Add-on Development

Learning the basics of JavaScript and Firefox add-on development by building two simple Firefox add-ons.

Last Thursday (7th April) we held the second of our Thursday Night Sessions, which was the first of my software topics: A Very Basic Introduction to JavaScript and Firefox Add-on Development.

We had ~25 people show up, from kids to IT professionals – most with a laptop in hand (and Firefox installed). For many of them, this was their first time programming; for others, it was their first time using JavaScript. By the end of the night, everyone had made their first two Firefox add-ons.

The slides I started off with are available here. They act as an introduction to the talk and to basic JavaScript and programming concepts.

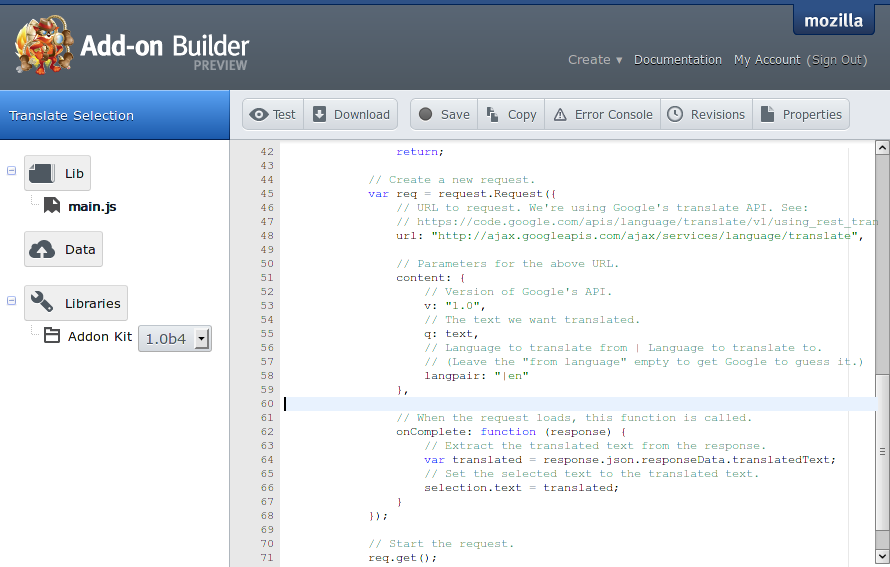
The rest of the talk was learn-by-example and learn-by-doing. I walked everyone through using Mozilla’s Add-on Builder – a webapp that lets you easily code and test Firefox add-ons using the new Add-ons SDK.

Add-on Builder

We built two add-ons:

  • Wikipedia Button – An extremely simple add-on that adds a button to the bar at the bottom of your browser, with the Wikipedia logo. Clicking it will open Wikipedia in a new tab.
  • Translate Selection – A less-simple add-on that adds a “Translate Selection” item to your context menu (right-click menu). When you select some text, right click, and select “Translate Selection”, the text you selected will be translated into English (using Google’s translation service).

This was a 2 hour talk, which included me walking around to talk to and help individuals/small groups. I covered a lot in this talk – so try not to get too intimidated by it. Just keep playing around, and keep learning. In my next software talk (21st April), I’ll be sticking to the basics of JavaScript – this time, we’ll be using it in a web page. And feel free to come in to the workshop on Saturdays (1pm to 5pm) – I’ll be happy to answer any questions.

Resources from this talk:

Additional resources: