Using the inductor tester

inductor tester
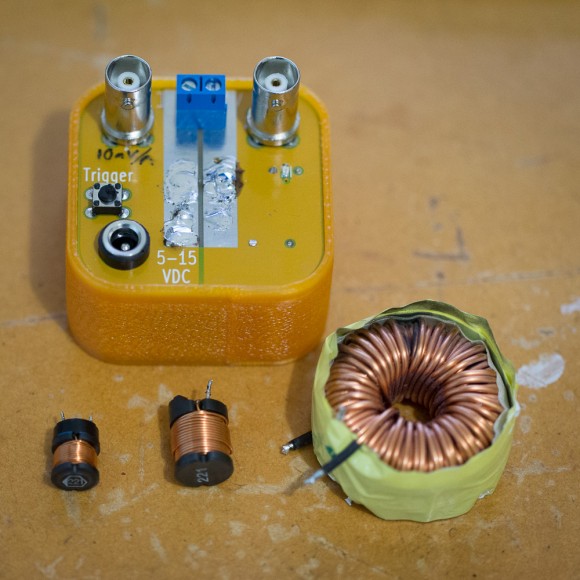
The inductor tester, and inductors used for examples below

A few weeks back, we had a talk on KiCad (presentation available at http://ianrrees.github.io/KiCad_talk/ ) where we ordered some PCBs to make an inductor tester (Henryometer?) from dirty PCBs. Those boards came in this week, and a few folks have already put theirs together. This post aims to be a quick guide to the usage of the tester; if you’d like to build one yourself just let Ian know, parts cost is $15. You’ll need an oscilloscope and a current-limited DC power supply to make use of it.

Continue reading “Using the inductor tester”

Debugging AVRs (without Atmel Studio)

This post is somewhere between a guide and a collection of notes, aimed at debugging programs for AVR microcontrollers (like the ones in most Arduinos) “on target”. We’ll be using an AVR Dragon connected to the target micro via the normal 6-pin programming header, with a Mac or Linux PC as the host.

Although this is a bit more advanced than most of our other projects, it’s really quite approachable and is a very powerful technique for fixing AVR software problems.

From a high level; we’ll use a debugging program on a Mac (or Linux, Windows, etc) “host” computer, which communicates with a Dragon “In Circuit Emulator” (ICE) via USB to debug a buggy program running on the “target” AVR, which is presumably running in some circuit we’re interested in. Small variations might apply for Windows hosts, using JTAG instead of DebugWIRE, other debugger tools (Atmel JTAGICE mkII for example), etc.

Continue reading “Debugging AVRs (without Atmel Studio)”

Arduinos and Macs

arduino

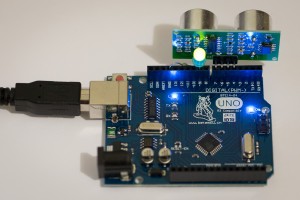
This evening, I finally got around to unwrapping the Arduino clone that came with my DSpace membership. Starting a project for the board couldn’t be easier, using the nice Arduino IDE from https://www.arduino.cc, but I ran into a little snag when it was time to upload the program onto the board. It turns out that these clone Arduinos use a newish low-cost USB to serial converter chip called a CH340G, rather than the FTDI brand chips used in the genuine Arduino boards. The CH340G that isn’t supported by MacOS by default, and I use MacOS, so the board didn’t show up in the Arduino application’s list of serial ports…

Fortunately, other folks have run into the same problem and have written up some nice blog posts on how to solve exactly this issue!

Moving

As you may have heard, the Dunedin Maker Space is getting ready to move to a new location in the Northeast Valley. The Allen St Workshop provides exciting new opportunities for the maker space including a concrete floor, collaboration with other like-minded folks, and there’s a fibre optic box out front!

We’ll continue to meet in the current King Edward College location as usual until 8 August when the move to the Allen St Workshop will commence. Stay tuned!

Sourcing RepRap parts around Dunedin

Things to note

  • Don’t get too hung up on bolt length. Get something longer than required and cut it down with a dremal or hacksaw.
  • Some reprap parts lists don’t include the extruder parts, so make sure you read what you need for those as well.
  • Please add comments for other places you have bought stuff or for things I need to fix.

Continue reading “Sourcing RepRap parts around Dunedin”

Electronics 101

I’ve included here the electronics1 talk I gave this week as a PDF

Remember the simple takeaways from this talk:

– the relationship between voltage, current and resistance – in particular bigger resistors mean less current

– capacitors pass AC and block DC

– inductors block AC and pass DC

– bipolar tranistors control a large amount of current with a small amount of current

– FET transistors control a large amount of current with a voltage

Please go and play with the excellent circuit simulator at:

http://www.falstad.com/circuit/e-index.html

try playing with resistors, current and voltage – and of course grab some and a meter at Makerspace and have a play

Week 2 talk electronics2 is also here as a PDF – transformers, diodes, power supplies, op amps and timers


Using solder stencils

I talked last week (April 18th) and gave a demo of using solder stencils to  make surface mount PCBs  and promised to post useful links.

I had my stencil made by Smart Prototyping ( http://smart-prototyping.com) – they offer stencils starting at $20 when boards are made (http://smart-prototyping.com/index.php?route=product/product&product_id=142)

Seeed (http://www.seeedstudio.com) also offer stencils for $70 (http://www.seeedstudio.com/depot/pcb-stencil-service-p-1391.html?cPath=185)

I ordered the stencil jig from AliExpress from: http://www.aliexpress.com/wholesaleproduct/wholesaleProductDetail.htm?productId=671199709&productSubject=NEW-stencil-printing-machine-24-30cm-Stencil-Printers-SMT-Stencil-Printers-manual-stencil-printer-with-solder – they come in a bunch of different sizes

I ordered my cheap reflow oven also on Aliexpress  from: http://www.aliexpress.com/wholesale?SearchText=t962&CatId=0&catId=

Stencils can also me made on a stencil cutter (http://blog.makezine.com/2011/11/01/solder-stencils-via-electronic-craft-cutter/ – google around there are lots of articles)

LED Throwies

Well we’re starting up for the year – in fact we’ve already sort of started with regular Thursday and Saturday open workshops for the past few weeks – on March the 14th we’re going to have our first organised night – of you haven’t come before or want to check us out come on down – we’re going to make LED throwies in honour of the first night of the fringe festival – we’ll have parts for sale – these are buildable by anyone without any prior experience other than ability to use masking tape.


http://www.instructables.com/id/LED-Throwies/


It’s that time of year again – financially we’re running on empty – time to pay your yearly dues – they haven’t changed from last year:


– $20/month for waged or preferably $240 for the year in advance – we’re still offering a free kit (badge or base) or, this year, an LED throwie pack if you pay for the year

– for the unwaged and students – a gold coin please in the blue box

– if you’re a member so are your kids

– no one will be turned away

Fab8NZ Un-Conference and Academic Symposium

Here are the Fab8nz conference talk slides that I used for the talk I just gave. Included in these slides are three video clips that can be found on YouTube:

– The KamerMaker Grand Opening with a first print of their 2x2x3.4m 3D printer is here.

– The making of the conductive ink for a ballpoint pen is here.

– The Solar Sinter video is here.

There are also a number of other resources that are also mentioned:

– Vik Ollivers website where he has blogged about some of his techniques for constructing the “fiddly bits” of a Reprap extruder.

– The FabLab Store where you can buy the Hydrogen Fuel Cell and its accessories.

– The Silverlight 6 1/2 hour webcast of the Academic Symposium (ofline at the time of posting).

– The Anthony Atala TED talk about bio-printing organs where he shows the audience a bioprinted kidney.

– The Project Re upcycling website where the function of everyday items is transformed, sometimes with the help of 3D printed items.

– Markus Kayser’s  solar sinter project webpage.


I ended the talk by pointing out some of the talks at the HOPE9 conference that I had been listening to that were extremely interesting. If you do not have physical access to the DVDs I left in the Makerspace you can download the audio straight from their website. The only difference is the DVDs contain 128kbps mp3s and the website only has 16kbps and 64kbps versions.